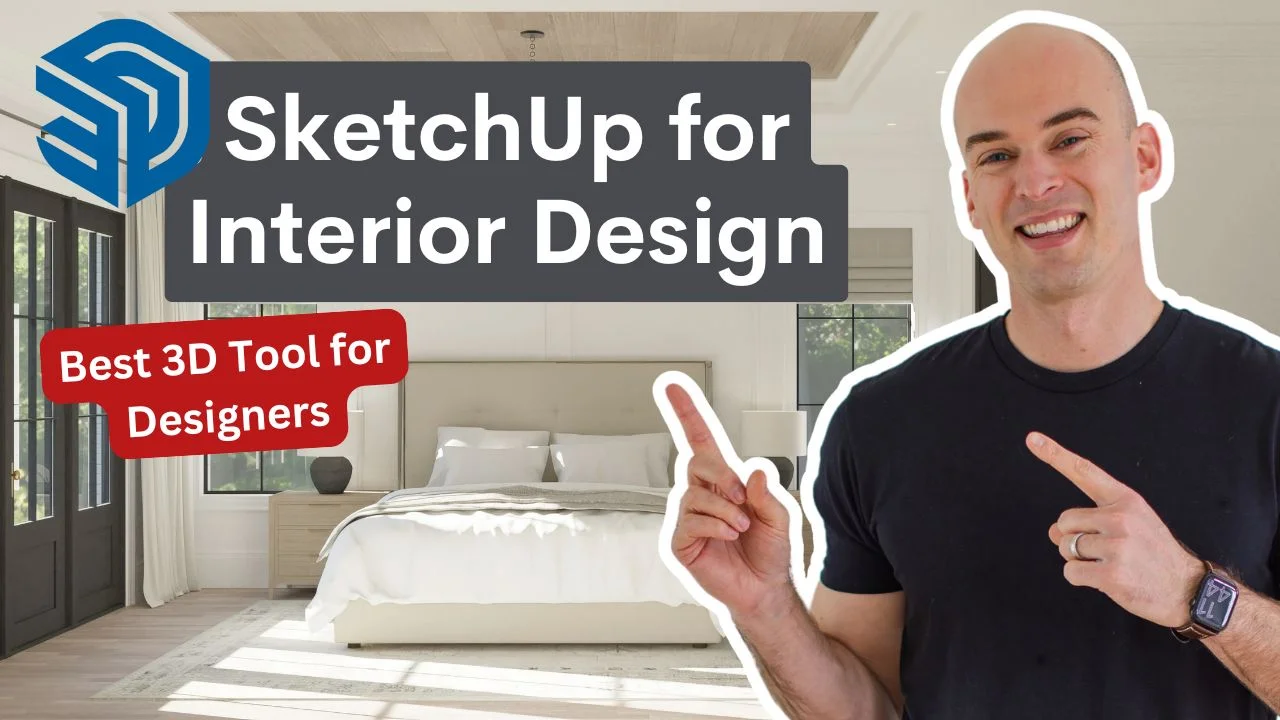
SketchUp for Interior Design – Best 3D Tool for Designers
Are you an interior designer or a home renovator looking to elevate your projects? SketchUp might be the perfect solution for you. Known for its user-friendly interface and versatility, this powerful tool allows you to create stunning designs without the steep learning curve. In this article, I’ll explore why SketchUp and SketchUp Pro are essential tools for interior design projects, highlight the benefits of my FOCUSED SketchUp + AI for Interior Design, and share practical tips to maximize efficiency and creativity. Get ready to unlock your design potential with the best way to integrate new features into your workflow!
*Affiliate links may be used throughout this article. Read our Privacy Policy for more information.
Table of Contents
Key Takeaways:
- Simplify your design process with SketchUp's user-friendly interface, versatile design options, and time and cost efficiency.
- Join the FOCUSED SketchUp + AI for Interior Design course for structured training in interior design applications, AI-powered photoreal rendering, and LayOut for presentation boards.
- Master SketchUp for interior design by creating floor plans, adding furniture and decorations, applying AI-powered materials and lighting, and presenting designs with LayOut.
Why Use SketchUp for Interior Design?
SketchUp has emerged as a pivotal tool for interior designers, offering an intuitive interface that eases the design process, enhances creativity, and improves collaboration among various stakeholders in interior design projects. Whether you are dealing with small design studios or large-scale renovations, SketchUp is equipped with features that cater to diverse needs, including the creation of detailed floor plans and realistic 3D models. Its versatility makes it ideal for various interior spaces, from kitchens to living rooms and even specialized applications like Masonic lodge designs, allowing interior designers to experiment with different layouts effortlessly.
User-Friendly Interface
The user-friendly interface of SketchUp is one of its standout features, making it accessible for both novice and experienced interior designers looking to enhance their skills through online courses and live training, including my library of SketchUp and V-Ray courses.
With its intuitive layout, learners can dive in without feeling overwhelmed, efficiently grasping the essentials of 3D modeling.
The seamless integration allows users to produce stunning designs quickly, fostering creativity and streamlining projects. Many testimonials highlight how business owners and interior designers have revolutionized their interior design workflow using this tool. For example, a small design studio reported a significant increase in productivity after adopting SketchUp. The ease of navigation and illustrative guides enable users from various backgrounds, proving beneficial not only for seasoned professionals but also for beginners eager to explore their design potential.
Versatility in Designing
SketchUp’s versatility in designing allows interior designers to create a wide range of interior spaces and different layouts, adapting to the unique needs of each project.
This adaptability is particularly evident in applications ranging from kitchen designs to sophisticated office layouts. For instance, when envisioning a modern kitchen, the software enables designers, including kitchen designers and cabinet makers, to experiment with layouts, materials, and cabinetry, ensuring functionality and aesthetics work seamlessly together.
Similarly, in office environments, SketchUp can be utilized to craft open-plan setups that enhance collaboration, while also exploring isolated spaces tailored for focused work. Further exemplifying its customization capabilities, practitioners can use the software to represent different lighting conditions or even furniture arrangements, such as d models and d drawings, significantly aiding client presentations.
This level of detail and adaptability not only streamlines the design process but also makes it easier for designers to present various design ideas clearly and compellingly.
Time and Cost Efficient
Utilizing SketchUp proves to be both time and cost-efficient, streamlining the design process for interior designers and enhancing their productivity in managing interior design workflows.
This innovative software minimizes the moment of frustration often encountered in design projects by facilitating quicker iterations and revisions. With its intuitive interface, designers can make adjustments in real-time, allowing for a creative flow that increases overall effectiveness.
- Reduces material waste by enabling precise measurements and planning.
- Improves project timelines through efficient collaboration.
- Helps in visualizing concepts easily, thus avoiding costly mistakes.
As a result, the costs associated with rework and excess materials are significantly lowered, contributing to a more sustainable approach in the interior design industry.
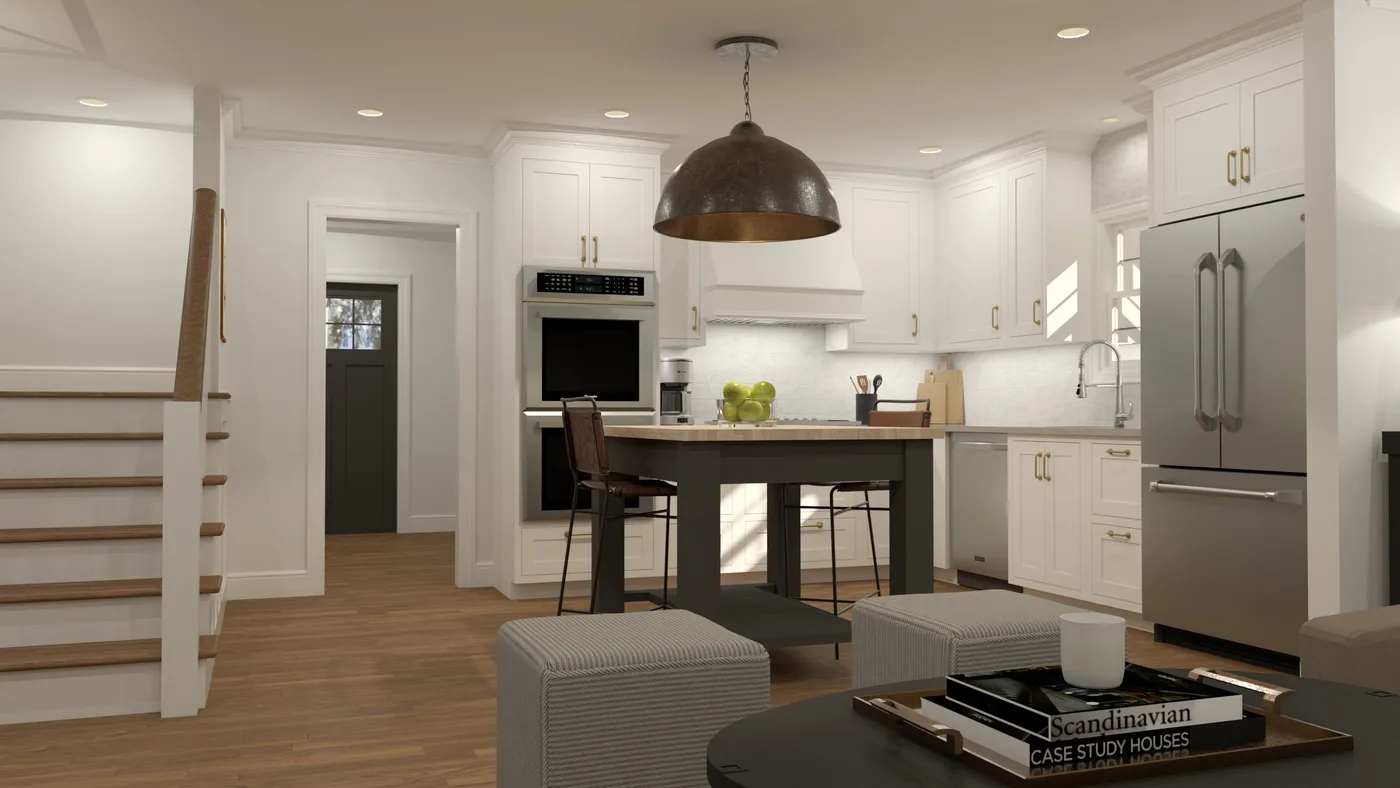
High-Quality Renderings
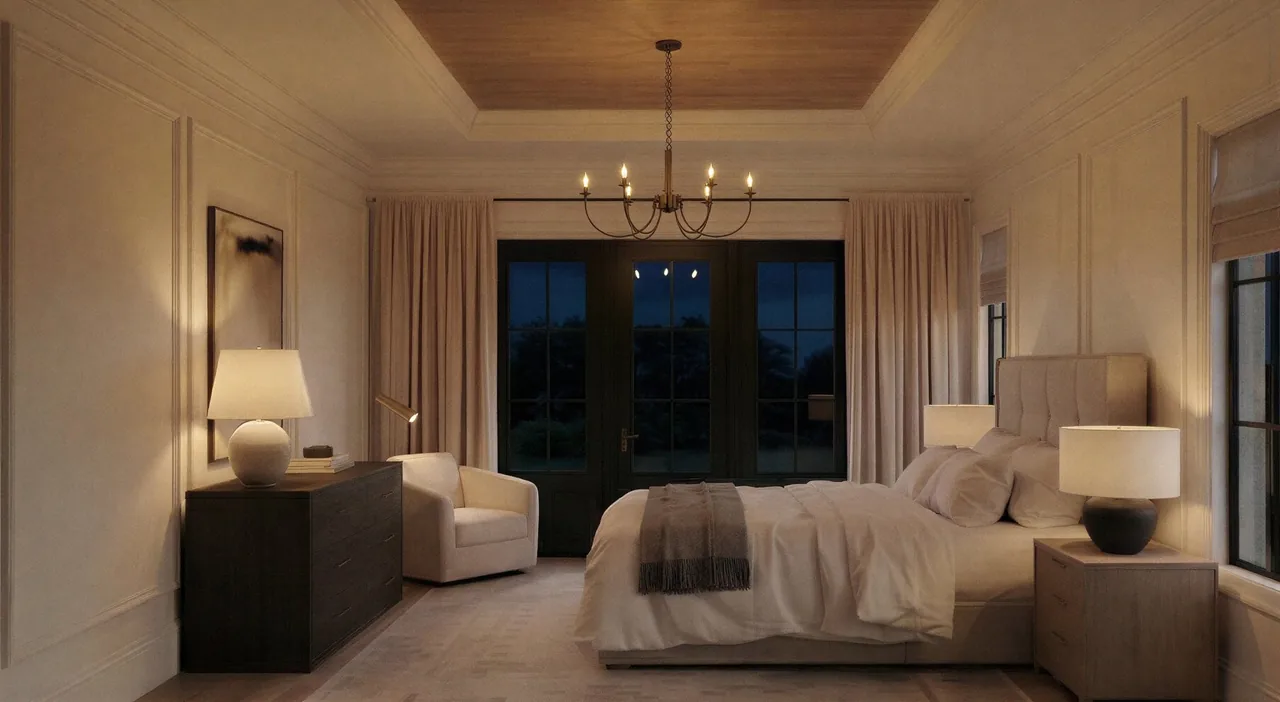
With the integration of V-Ray, SketchUp enables interior designers to create stunning photorealistic renderings that captivate clients and provide a clear vision of the final results.
This powerful combination allows users to elevate their designs to new heights by utilizing sophisticated features that enhance both the realism and detail of their projects. By employing V-Ray’s advanced lighting system, designers can simulate natural light and shadows, bringing spaces to life in a way that traditional rendering tools simply cannot match.
- Realistic materials enable the creation of intricate surfaces, making them look as authentic as possible.
- Top-notch textures provide depth and character, resulting in truly immersive environments.
For instance, a well-known project featuring a modern urban loft utilized V-Ray’s capability to replicate polished concrete floors and warm wood finishes, leading to glowing reviews from clients.
Another notable case involved a luxury office space where designers showcased natural light filtering through expansive windows, complementing their choice of contemporary furnishings—all rendered with striking realism thanks to the integration of V-Ray.
How to Use SketchUp for Interior Design?
Using SketchUp for interior design involves mastering its features to create accurate floor plans and detailed 3D models, enabling designers, including home renovators and landscape designers, to visualize their concepts and assess spatial dynamics effectively.
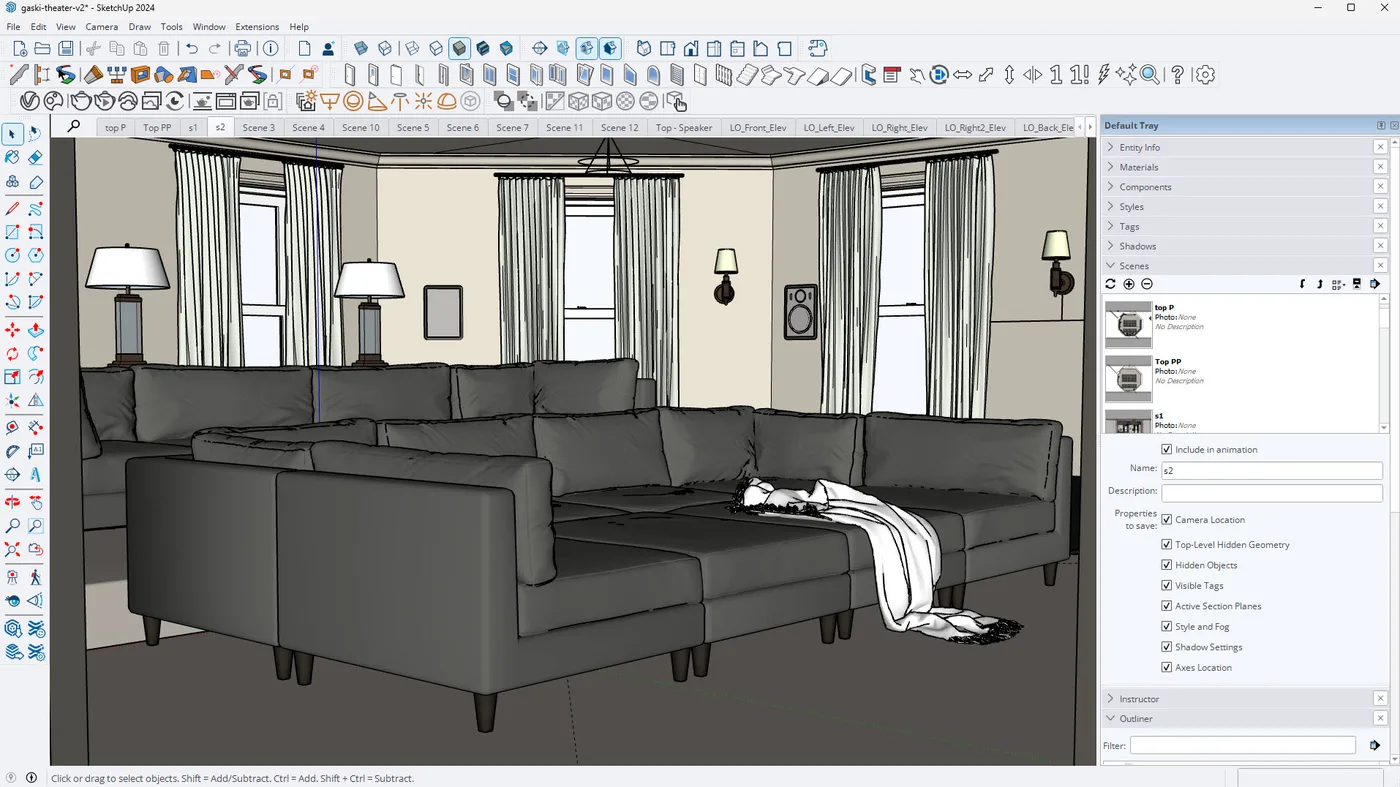
Creating Floor Plans and 3D Models
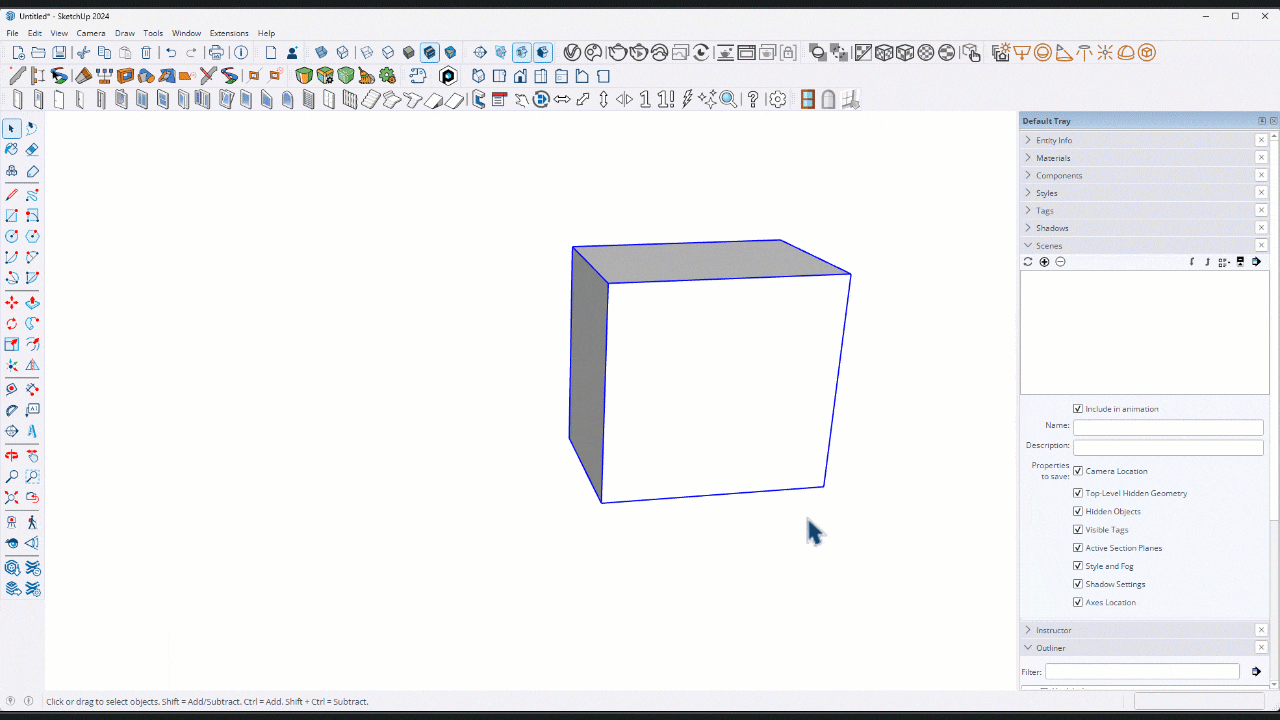
Creating floor plans and 3D models in SketchUp is straightforward due to its intuitive tools designed specifically for interior spaces.
These tools not only enable users to construct precise layouts but also facilitate a range of functions essential to the design process. For instance, measuring distances with precision ensures that all elements fit perfectly within the designated areas. Drawing walls becomes effortless, allowing for rapid adjustments and modifications as ideas evolve. Users can easily add dimensions to walls and fixtures, making it simple to visualize space constraints and ensure accessibility.
Transitioning from 2D to 3D modeling is a significant leap, as it offers a more immersive experience. This move allows designers to see their plans come to life, giving them the ability to assess how colors, materials, and lighting affect the overall feel of the space.
- Enhanced visualization of design concepts
- Realistic representations of materials
- Better communication with clients
In this way, those utilizing SketchUp gain a comprehensive understanding of their projects, ultimately leading to better design choices and outcomes.
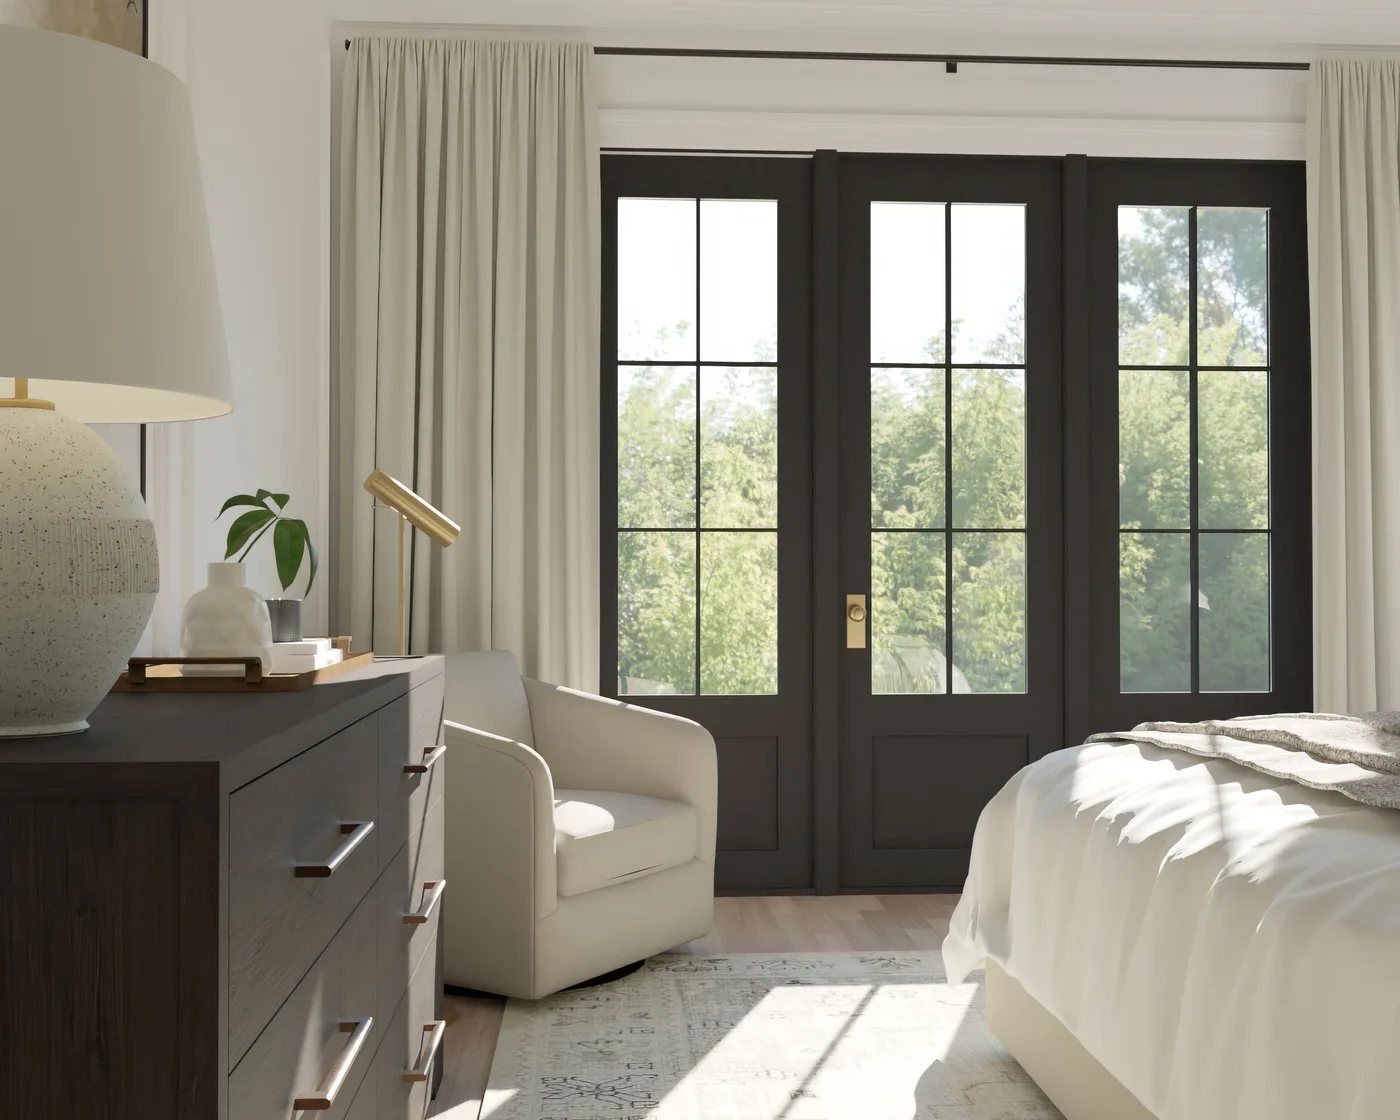
Adding Furniture and Decorations
Adding furniture and decorations to your SketchUp models enhances the visualization of interior design elements and helps in understanding spatial arrangements better.
By incorporating a variety of furniture pieces, ranging from sofas to tables, one can create a more immersive experience, enabling clients to visualize their spaces with clarity. This process typically involves either importing existing models from libraries such as the 3D Warehouse or creating custom pieces directly within the software.
Utilizing high-quality models is crucial as they lend realism and depth to the design.
- Use websites like 3D Warehouse for a vast selection of pre-made furniture.
- For unique pieces, design custom furniture elements within SketchUp.
- Group furniture items logically to facilitate easy movement and rearrangement.
Leveraging tools such as the move and scale functions can help in effectively arranging these models. Considering the flow of the space and the proportion of each item can significantly impact the overall design.
Utilizing V-Ray for Realistic Materials and Lighting in Interior Design Elements
Utilizing V-Ray within SketchUp allows designers to apply realistic materials and lighting effects, elevating the quality of visual presentations.
When considering the best approach to enhancing a project, it’s essential to delve into the specifics of material selection and lighting adjustments.
Begin by choosing high-quality materials that closely mimic real-world textures; this can significantly influence how a design is perceived.
Next, incorporating appropriate lighting techniques, such as using both natural and artificial light sources, can dramatically change the atmosphere of a scene.
These adjustments not only improve the visual appeal but also play a pivotal role in client satisfaction, as realistic renderings help convey the designer’s vision with precision.
Ultimately, embracing these features within V-Ray can lead to more successful presentations and delighted clients.
Organizing and Presenting Designs with LayOut
Organizing and presenting designs with LayOut is essential for creating professional-looking documentation that clearly conveys design concepts to clients.
By utilizing LayOut, designers can seamlessly compile various elements—such as sketches, photographs, and detailed annotations—into visually appealing presentation boards. This approach benefits not only experienced users but also those experimenting with new software solutions.
To achieve this, it’s important to explore different layout options that enhance the overall aesthetics while ensuring clarity. Consider implementing grids and alignment tools to provide a structured appearance.
- Integrate text effectively by using complementary fonts and sizes that don’t overshadow visual elements.
- Utilize whitespace strategically to prevent overwhelming the viewer.
When preparing for client presentations, it’s crucial to tailor the content according to their preferences and expectations, showcasing designs in a way that resonates with their vision.
Tips for Using SketchUp for Interior Design
To maximize the potential of SketchUp for interior design, several tips can enhance efficiency and creativity, from utilizing keyboard shortcuts to experimenting with different styles and materials. For those new to the software, even the free version of SketchUp offers robust tools to explore.
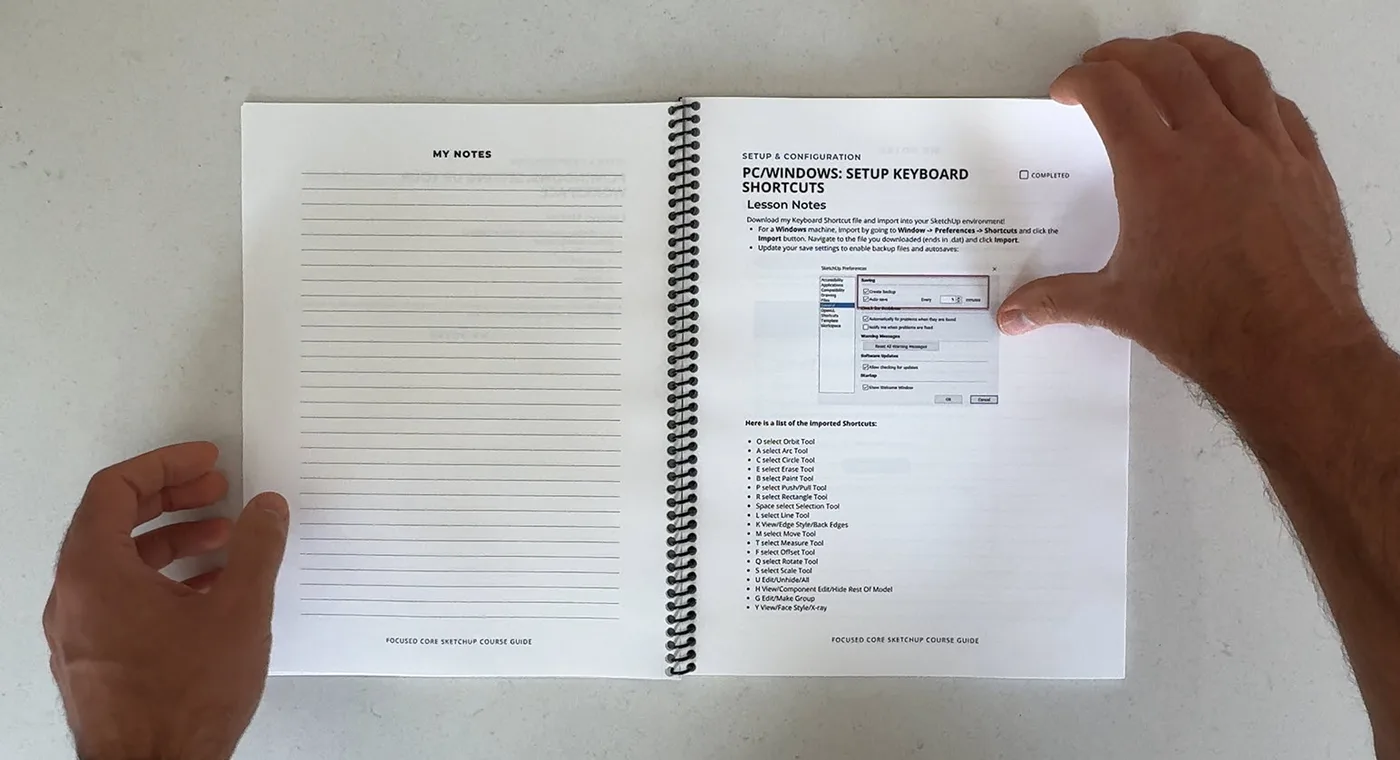
Take Advantage of Keyboard Shortcuts
Taking advantage of keyboard shortcuts in SketchUp can significantly enhance efficiency during the design process, allowing for quicker navigation and execution of tasks.
By mastering these vital shortcuts, users can reduce the time spent on repetitive actions, enabling them to focus more on the creative aspects of their projects. Instead of grappling with menus and icons, becoming familiar with the keys and their corresponding functions can make the workflow much smoother.
This not only elevates productivity but also encourages a more intuitive interaction with the program. Here are some of the most useful keyboard shortcuts to consider:
- Selection Tool (Spacebar): Quickly switch to the selection tool to modify objects.
- Paint Bucket (B): Apply colors and materials to surfaces and objects.
- Push/Pull (P): Extend or retract a surface to create a three-dimensional shape (such as walls in a floorplan).
Incorporating these shortcuts into daily use will undoubtedly lead to a more streamlined design experience.
Utilize Layers and Groups for Organization
Utilizing layers and groups in SketchUp is a powerful technique for organization, helping to simplify complex designs and streamline the design workflow.
By effectively creating and managing layers and groups, a designer can not only keep track of various elements but also enhance collaboration and project clarity. This becomes particularly advantageous when working on intricate landscapes or architectural models, where various components must be manipulated without disturbing others.
For instance, consider a scenario where a designer is working on an urban development project. By categorizing buildings, trees, and roads into separate layers, it becomes much easier to isolate specific features without clutter. Groups act as containers, allowing multiple objects to be treated as a single entity, facilitating quick adjustments and enhancing productivity.
- Benefit of Layers: Easily hide or lock specific elements to focus on the task at hand.
- Benefit of Groups: Keep related elements together, making displacement and rotation straightforward.
Designers have successfully embraced these approaches in their projects by using clear names for layers, avoiding confusion and ensuring the team can navigate complex files effectively.
Use Components for Repeated Objects
Using components for repeated objects in SketchUp not only saves time but also enhances design efficiency by ensuring consistency across multiple elements, allowing designers to focus more on creativity rather than on repetitive tasks. This approach fundamentally transforms the design workflow, enabling smoother collaboration and ease of updates.
Effectively creating and managing components is vital in maintaining a uniform appearance throughout any project. When the designs feature consistent elements, they not only look better but also resonate more with the intended audience.
Here are some commonly reused objects in interior design that exemplify this principle:
- Furniture Pieces: Tables, chairs, and sofas often benefit from being turned into components. By reusing the same model, a designer can ensure that all pieces have matching dimensions and styles.
- Lighting Fixtures: Ceiling lights or wall sconces can be made into components, maintaining the same aesthetic throughout different rooms.
- Architectural Elements: Windows, doors, and moldings can all be standardized by creating components, which simplify future modifications.
By utilizing components, the designer can quickly adjust any modifications across all instances where that object appears, thereby streamlining the entire design process.
Experiment with Different Styles and Materials
Experimenting with different styles and materials in SketchUp is essential for developing innovative design ideas that meet client specifications.
When designers embrace this experimentation, they unlock a world of possibilities that not only enhance aesthetic appeal but also ensure functional effectiveness. By diving into the vast library of styles and materials that SketchUp offers, one can discover unique textures, colors, and finishes that elevate a project from ordinary to extraordinary.
- Tip 1: Start by categorizing styles based on the overall theme of the project. Organizing materials can streamline your selection process.
- Tip 2: Don’t hesitate to mix and match styles; the most innovative designs often emanate from unexpected pairings that showcase creativity.
- Tip 3: Utilize the preview feature in SketchUp to visualize how different materials work together, aiding in decision-making.
Ultimately, fostering a mindset willing to explore and take creative risks can lead to design breakthroughs that not only meet but exceed client expectations.
What is the FOCUSED SketchUp + AI for Interior Design?
The FOCUSED SketchUp + AI for Interior Design is a step-by-step training designed specifically to help interior designers master the essentials of SketchUp, AI rendering, and LayOut. This course equips you with the tools and skills to create detailed 3D models, generate photoreal renders with AI, and produce professional design documents for your clients. Whether you’re a beginner or have some experience, this course accelerates your learning with a comprehensive, hands-on approach.
How Does the course Work?
The FOCUSED SketchUp + AI for Interior Design course is structured around the major areas of SketchUp, AI rendering, and LayOut. You’ll work through video lessons that progress from installation and basic tools to advanced rendering and client presentations. The course is entirely self-paced, so you can work at your own speed.
What the Course Covers
The course is broken down into focused modules. Each one is built around a specific skill area, and you can move through them as fast or as slow as your schedule allows.
Setting Up SketchUp
Install and configure SketchUp, set your workspace and keyboard shortcuts, and learn the foundational navigation. You’ll get comfortable with the core tools — Select, Move, Line, Rectangle, Circle, Arc, Push/Pull, and Rotate — using the cheat sheet that comes with the course.
Organizing Your Model
Learn how to keep your projects clean and manageable using Groups, Components, Outliner, and Tags. This is what separates models that scale beautifully from ones that fall apart on the second client revision.
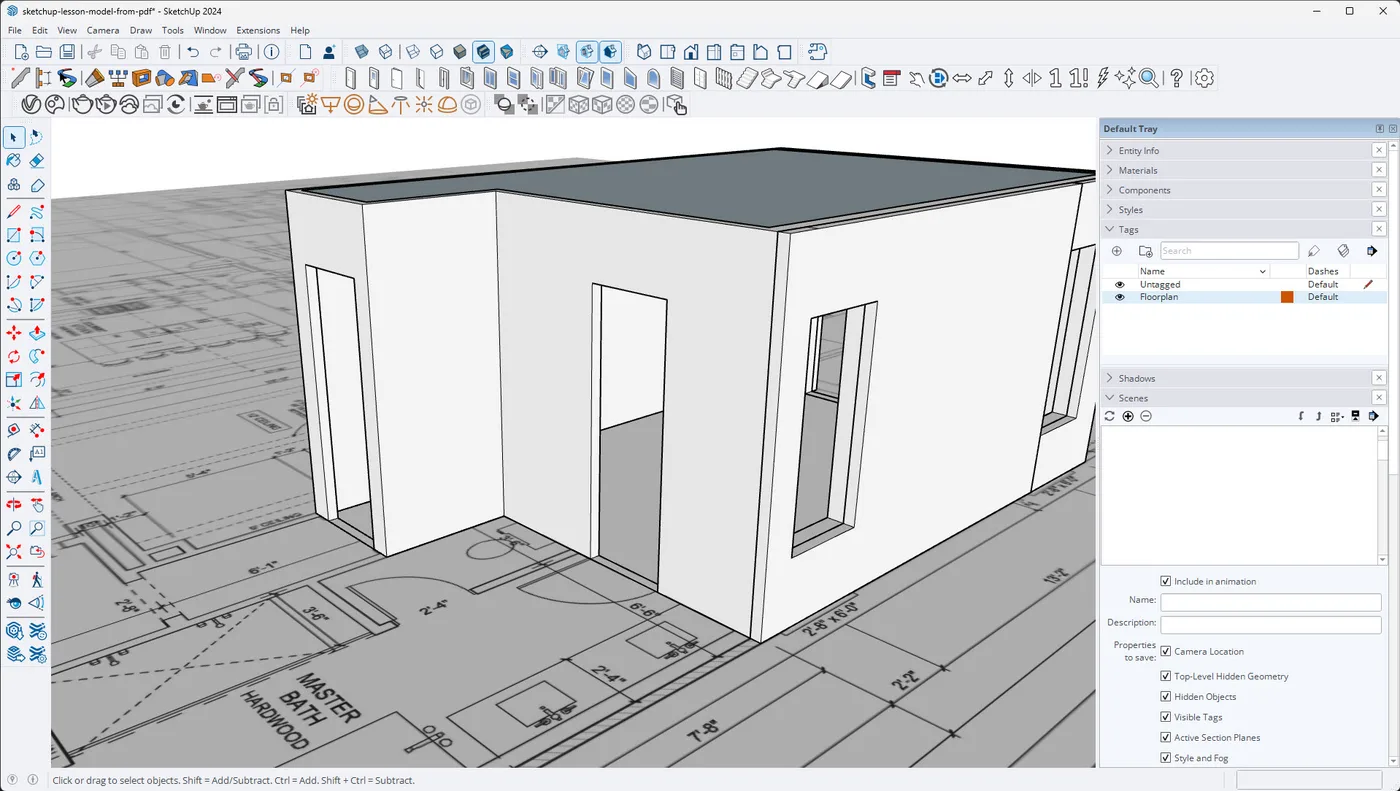
Modeling a Room from Scratch
Build a primary bedroom from scratch using your own dimensions, PDF floorplans, or DWG imports. You’ll add doors, windows, trim, and crown molding while organizing your component library so every future project moves faster.
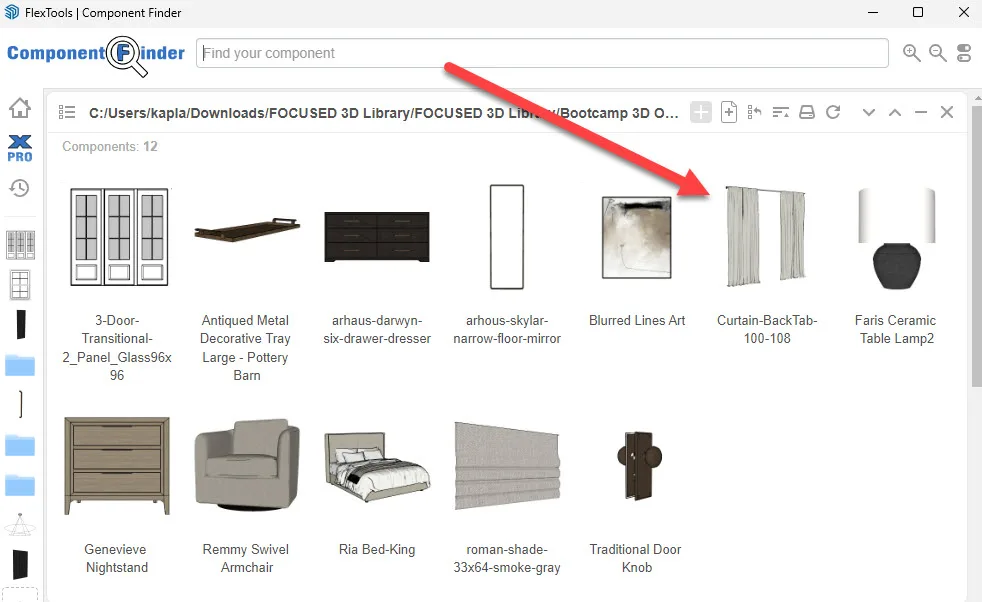
Decorating the Space
Source 3D objects and add furniture, rugs, artwork, curtains, and lighting to your model. You’ll learn where to find clean, low-poly components and how to drop them in without breaking your scene.
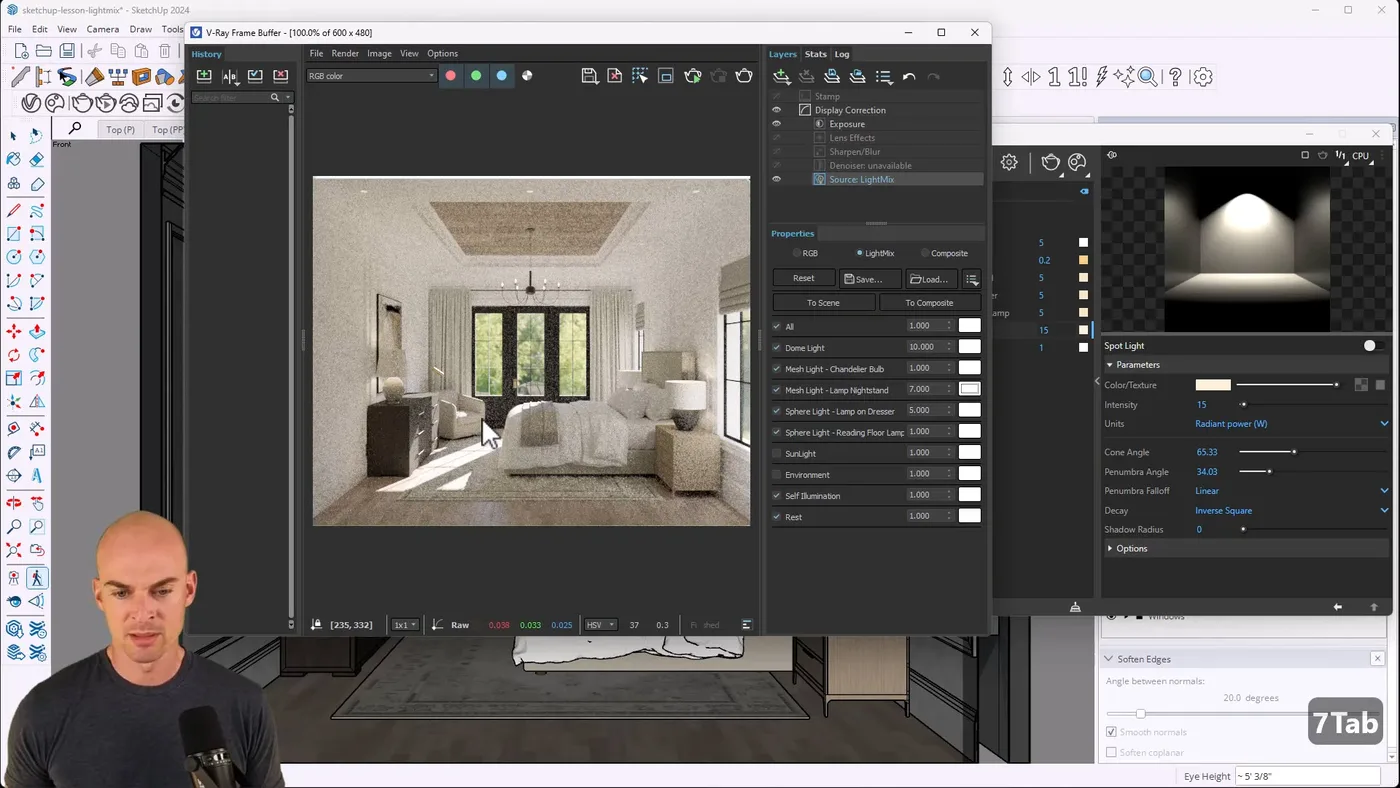
Creating Photoreal Renders with AI
This is the heart of the course. You’ll learn the AI rendering workflow I use on real client work — how to compose your scene, write prompts that generate the look you want, refine the output, and produce client-ready photoreal images without ever opening V-Ray.
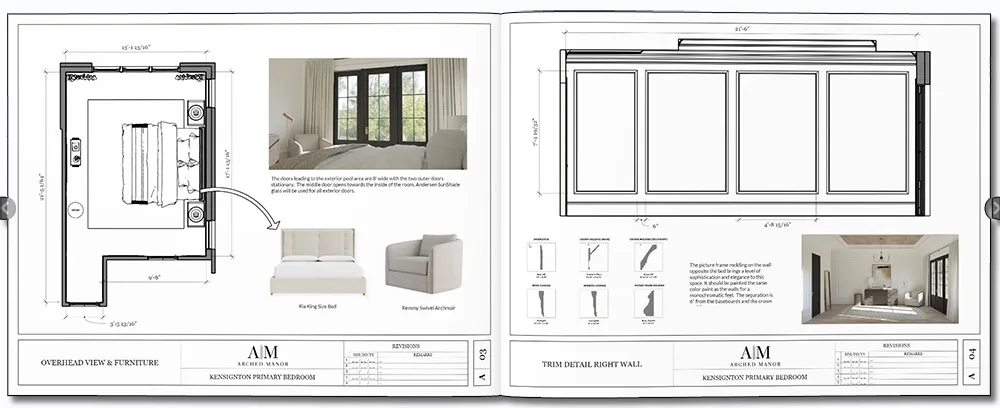
Creating Client Documentation in LayOut
Use LayOut to assemble professional design packets — set up templates, add text and dimensions, and combine your renders, floor plans, and elevations into client-ready presentations.
What’s Included in the course?
To make your workflow even faster, the course comes with several downloadable packs, including a door pack, window pack, hardware pack, recessed light pack, and paint libraries from Benjamin Moore and Sherwin Williams. These resources ensure you have all the elements you need to create detailed, professional models.
Who is this course For?
This course is perfect for interior designers, DIY enthusiasts, and any professional looking to upgrade their skills. It is also great for interior decorators, home stagers, architects, space planners, woodworkers, event planners, set designers, carpenters, and restoration companies. If you want to learn how to create realistic 3D models, stunning photoreal AI renders, and design documents in SketchUp, this course is tailored just for you.
Frequently Asked Questions
What is SketchUp and why is it a great tool for interior designers?
SketchUp is a 3D modeling software that is commonly used by interior designers to create detailed and accurate virtual representations of their designs. It is a versatile and user-friendly program that allows designers to visually communicate their ideas to clients and collaborators.
How can participating in the "FOCUSED SketchUp + AI for Interior Design" benefit me as an interior designer?
The "FOCUSED SketchUp + AI for Interior Design" is a structured training program designed specifically for interior designers. It provides a comprehensive and hands-on approach to learning SketchUp, allowing you to quickly enhance your skills and incorporate this powerful tool into your design process.
Does the "FOCUSED SketchUp + AI for Interior Design" cover all features of SketchUp?
Yes, the course covers all the essential features of SketchUp, including creating basic shapes, using advanced tools, applying textures and materials, and more. It also includes training on using V-Ray for photorealistic rendering and LayOut for creating professional 2D presentations.
How can SketchUp help me in the design process?
SketchUp allows interior designers to create detailed 3D models of their designs, making it easier to visualize and communicate their ideas to clients and collaborators. It also allows for quick and easy modifications, saving time and resources in the design process.
Can I use SketchUp for both residential and commercial interior design projects?
Absolutely. SketchUp is a versatile tool that can be used for both residential and commercial interior design projects. Its flexibility and user-friendly interface make it suitable for a wide range of design applications.
Is previous experience with 3D modeling software necessary to use SketchUp for interior design?
No, previous experience is not necessary. SketchUp is designed for beginners and professionals alike, making it easy to learn and use, even for those with no prior experience with 3D modeling software. The "FOCUSED SketchUp + AI for Interior Design" also provides step-by-step guidance, making it accessible to all skill levels.
Tags