FOCUSED Course
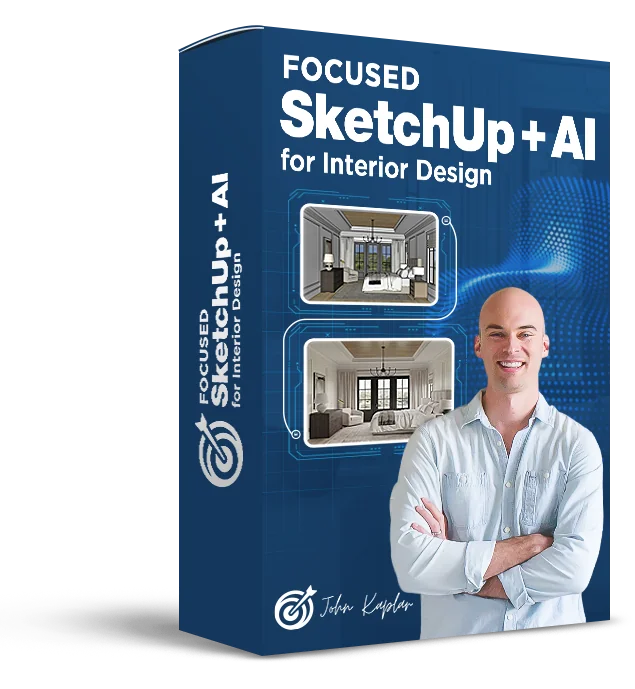
FOCUSED SketchUp + AI for Interior Design
The complete SketchUp and AI workflow for interior designers, from concept to client-ready visuals.
10 modules, 87 lessons, ~16 hours
Interior Design Presentations Should Show Clients Exactly What They're Getting - Before You Spend a Dollar on Product.
Most interior designers either skip 3D entirely, rely on mood boards that leave too much to imagination, or spend hours fighting software that wasn't built for their workflow. The result is more revision rounds, harder client conversations, and projects that take longer to close.
Modeling in
SketchUp
AI
Rendering
LayOut
Documentation
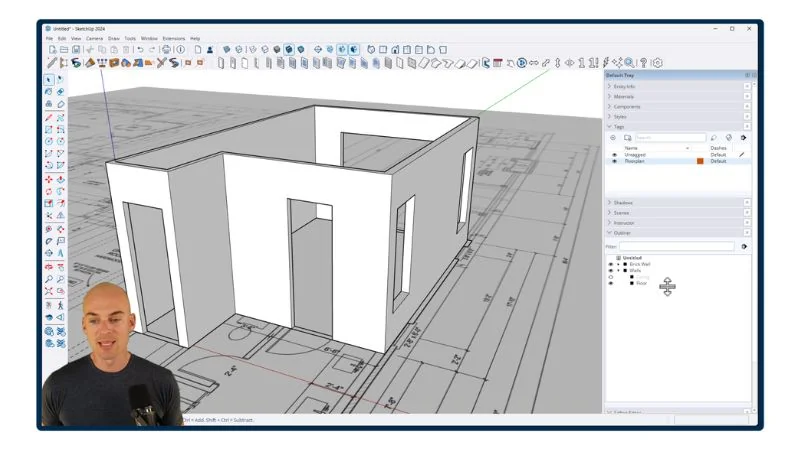
This course changes that. You'll model a complete primary bedroom from scratch in SketchUp - walls, doors, windows, trim, furniture, artwork, curtains, lighting - and turn it into photorealistic AI renders using the FOCUSED Method. By the end you'll have finished renders and a LayOut design pack ready to hand to your client.
Every module is structured, manageable, and purpose-built for interior design. No wasted time, no fluff - just the exact workflow that turns models into stunning client visuals.
See the Results
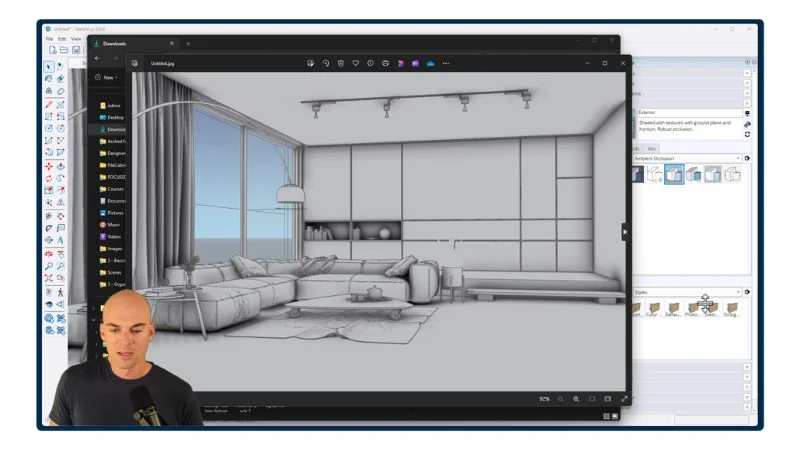
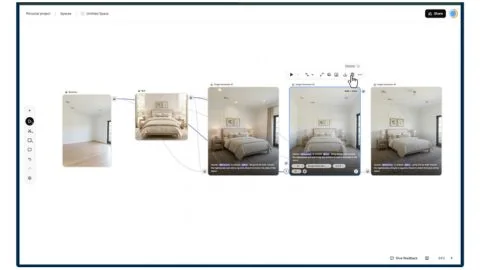
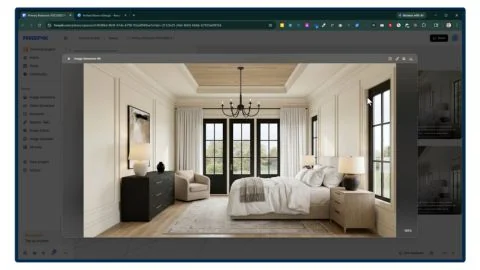
The AI Renders You Will Create
Using the workflow taught in this course, you'll learn how to create photorealistic AI renders of interior spaces showing furniture, materials, and lighting exactly as designed.
See the Deliverable
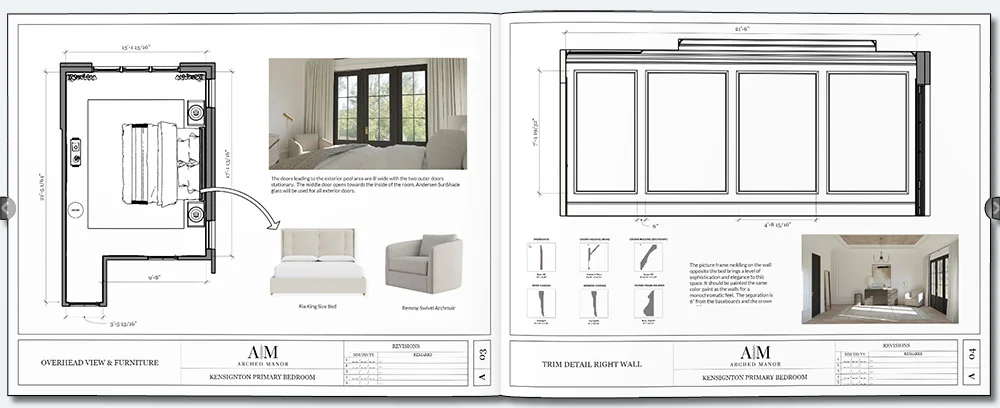
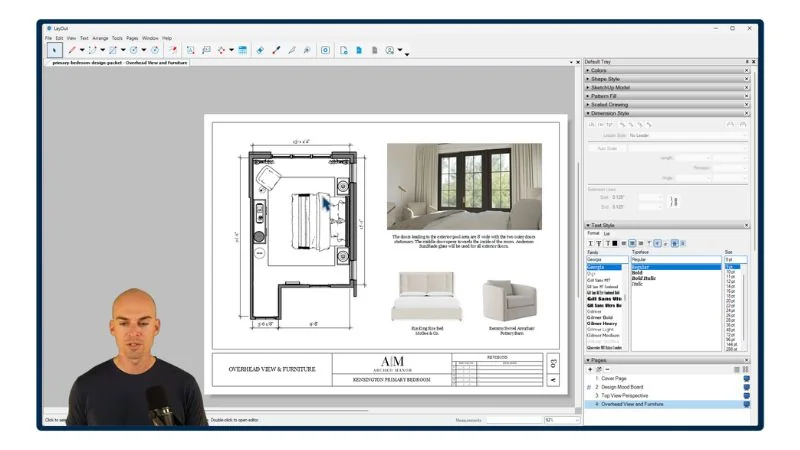
The Design Doc You Will Create
You'll use LayOut to create professional design documentation that impresses clients and closes projects - just like you see below.
Is this for you?
Who Is This Course For?
- Interior Designers
- Interior Decorators
- Construction Professionals
- Home Stagers
- Architects
- Space Planners
- Woodworkers
- Renovation Companies
- Restoration Companies
- Event Planners
- Furniture Designers
- Set Designers
- Carpenters
- Real Estate Developers
Course
Breakdown
Take a Peek at the
Course Structure
Inside this course you'll build a complete primary bedroom from scratch, covering my 3 core training programs: FOCUSED Core SketchUp, FOCUSED Core AI Rendering, and FOCUSED Core LayOut.
Module 1 - Core SketchUp - Installation & Configuration
- PC/WINDOWS: Installing SketchUp [6:07]
- PC/WINDOWS: Setting up Your Workspace [2:55]
- PC/WINDOWS: Setup Keyboard Shortcuts [3:02]
- MAC: Installing SketchUp [9:56]
- MAC: Setting up Your Workspace [9:55]
- MAC: Setup Keyboard Shortcuts [3:56]
- Intro and Cheat Sheet [3:42]
- Mouse and Navigation [9:16]
- Using the Keyboard [4:18]
Module 2 - Core SketchUp - Tools
- The Select Tool [4:33]
- The Move Tool [14:19]
- The Line Tool [11:33]
- The Rectangle Tool [6:35]
- The Circle Tool [4:47]
- The Arc Tool [3:30]
- The Tape Measure Tool [5:35]
- The Offset Tool [2:59]
- The Push/Pull Tool [3:56]
- The Rotate Tool [5:11]
- The Scale Tool [6:57]
- The Paint Bucket Tool [4:29]
- The Flip Tool [3:01]

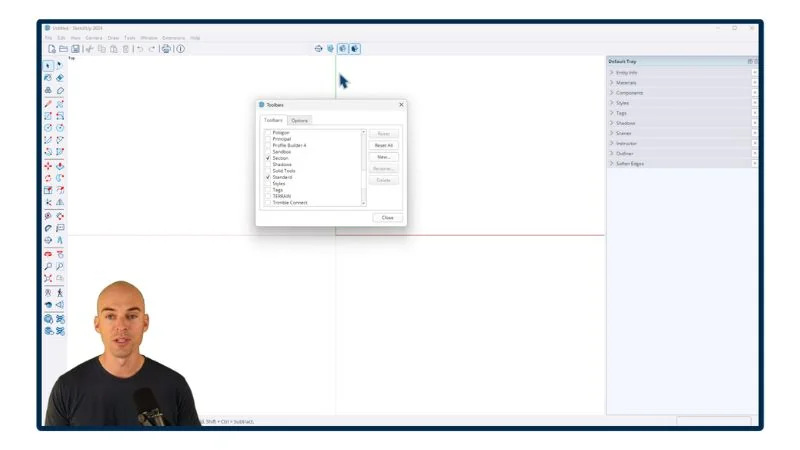
Module 3 - Core SketchUp - Organization
- Groups [11:56]
- Components [7:59]
- Outliner [7:47]
- Tags [7:51]
- Hiding and Unhiding [3:50]
- Section Cuts [8:36]
- Scenes [8:45]

Module 4 - Core SketchUp - Objects, Materials & Styling
- The Trimble 3D Warehouse [14:19]
- Materials in SketchUp [11:12]
- Applying SketchUp Styles [11:20]
Module 5 - Extensions & Plugins
- Component Finder by FlexTools [6:00]
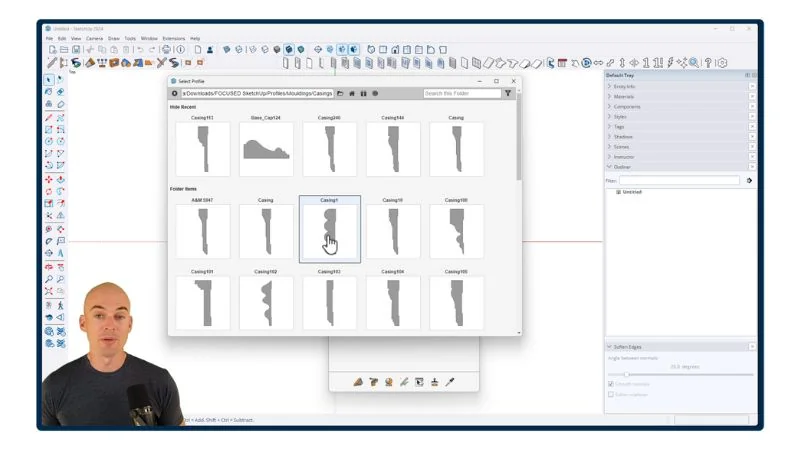
- Profile Builder [14:18]
Module 6 - Modeling the Room
- Starting from Dimensions [21:40]
- Starting from a PDF Floorplan [27:16]
- Starting from a DWG Floorplan [19:11]
- Creating Scenes [8:56]
- Organizing Your Library of Objects [19:51]
- Adding Doors [22:09]
- Adding Windows [4:02]
- Adding Trim and Moulding [49:23]
Module 7 - Decorating the Room
- 3D Object Sources [8:09]
- Creating an Area Rug [14:28]
- Adding Furniture: Bed and Nightstands [11:48]
- Adding Furniture: Dresser and Chair [6:57]
- Adding Artwork, Mirrors, and Pictures [22:44]
- Adding Curtains and Shades [14:32]
- Adding Light Fixtures and Lamps [20:57]
- Rendering Images with SketchUp [26:29]

Module 8 - AI Rendering
- What AI Rendering Is - And What It Is Not [11:31]
- The FOCUSED AI Rendering Framework™ [4:56]
- SketchUp Styles That Produce the Best AI Results [6:12]
- The FOCUSED Export Formula™ [5:42]
- Creating Your Account [3:13]
- Basic Tools: Image Generator [10:53]
- Basic Tools: Image Editor [13:42]
- Basic Tools: Image Upscaler [4:39]
- Basic Tools: Variations [4:03]
- Basic Tools: AI Assistant [4:13]
- Basic Tools: Video Generator [4:29]
- Basic Tools: Video Upscaler [3:55]
- Spaces: Introduction [5:57]
- Spaces: FOCUSED Node Workflow™ [31:08]
- Spaces: List [8:07]
- Spaces: Video Combiner [7:12]
- Using Templates [13:10]
- Creating Your Own Templates [12:55]
- AI Workflow 1: Conceptual Renders [7:50]
- AI Workflow 2: Enhancing Renders [17:32]
- AI Workflow 3: AI Rendering [4:28]
Module 9 - Rendering the Room
- Primary Bedroom: Step 1 - Load 3D Images [14:09]
- Primary Bedroom: Step 2 - Prompt & Reference Images [16:42]
- Primary Bedroom: Step 3 - Generate Master Images [23:30]
- Primary Bedroom: Step 4 - Create Variations [18:05]
- Primary Bedroom: Step 5 - Upscale & Download [3:53]
- Primary Bedroom: Step 6 - Create Video Clips [21:17]
- Primary Bedroom: Step 7 - Video Compilation [9:00]
Module 10 - Documentation with LayOut
- Templates and Document Setup [15:32]
- The LayOut Interface [6:11]
- Pages and Viewports [16:46]
- Text and Labels [8:06]
- Measurements and Dimensions [11:45]
- Scrapbooks [13:44]
- How to Export in LayOut [4:35]
- Presenting Your Document [3:45]
- Creating a Client Design Pack [1:08:24]
You'll also get
3 FREE Bonus Items
 Free
Free
200+ Page Printable Course Guide
A printable PDF with lesson notes from every module - perfect for following along and taking your own notes as you go.
 Free
Free
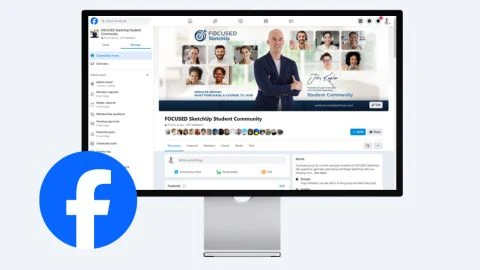
Private Facebook Group Access
Get support and help from me and fellow students inside the private FOCUSED SketchUp community - lifetime access included.
 Free
Free
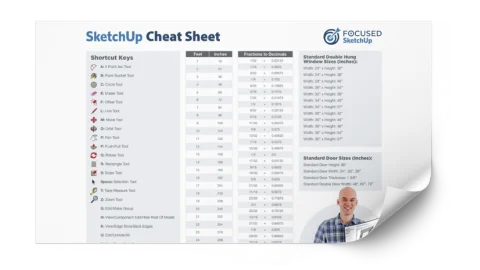
Printable SketchUp Cheat Sheet
My 2-sided SketchUp reference card with every shortcut, tool, and setting you'll use daily - printable and designed for quick lookup.
Everything you need
6 Packs, 1,000+ Objects - All Included FREE
 Free
Free
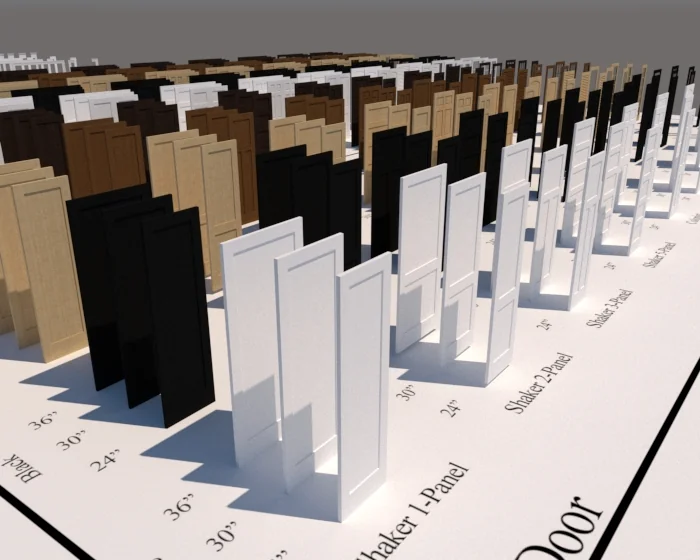
Interior Door & Trim Pack
300 doors in 10 styles, 6 sizes, and 5 finishes - plus 32 matching trim objects in 4 styles.
 Free
Free
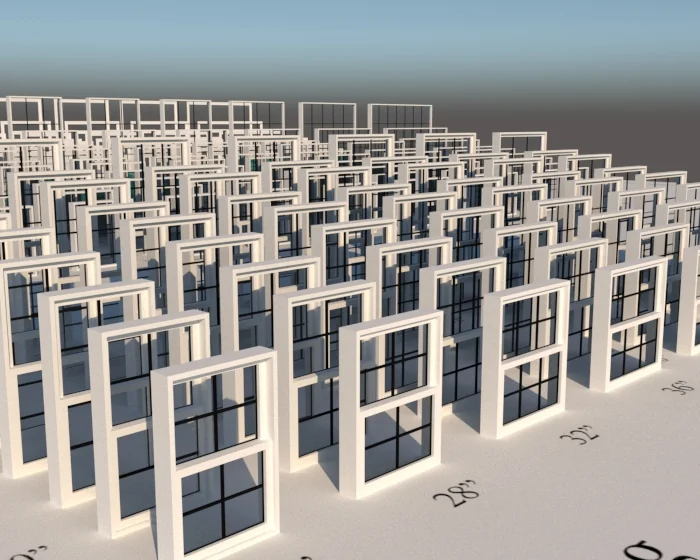
Window & Trim Pack
163 single-pane and double-hung windows with 100 matching pre-made trim casings included.
 Free
Free
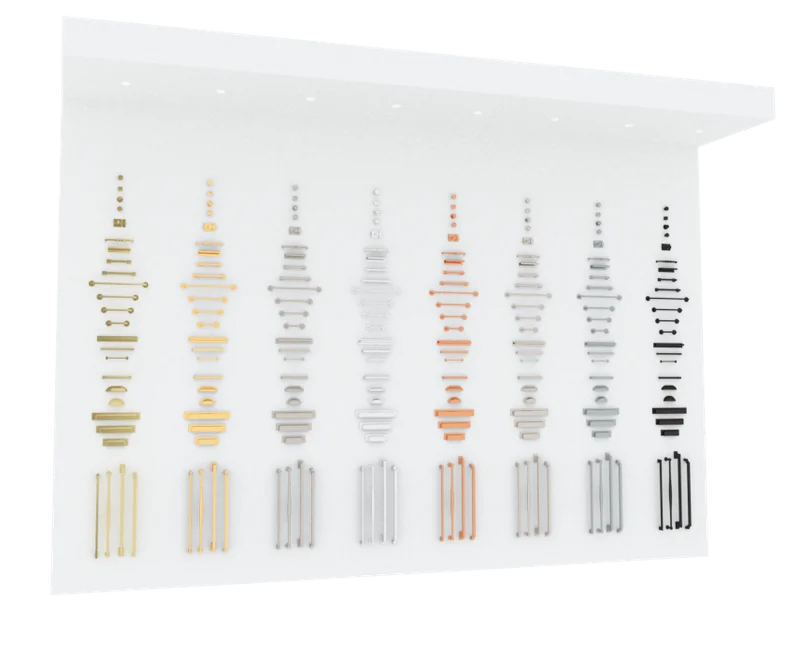
Hardware Pack
264 hardware pieces in 8 finishes - antique brass, polished nickel, matte black, and more.
 Free
Free
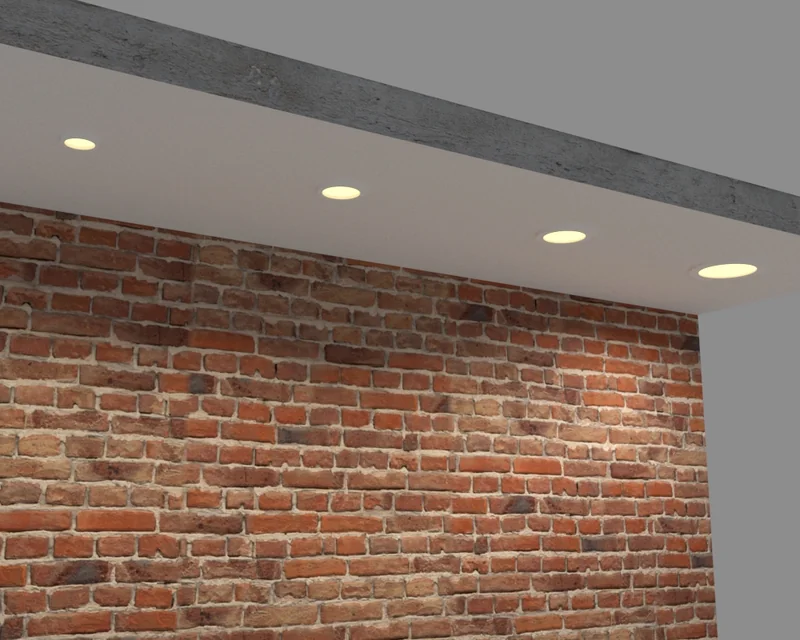
Recessed Light Pack
Four ready-to-go recessed lights in varying wattages to quickly add lighting into your model.
 Free
Free
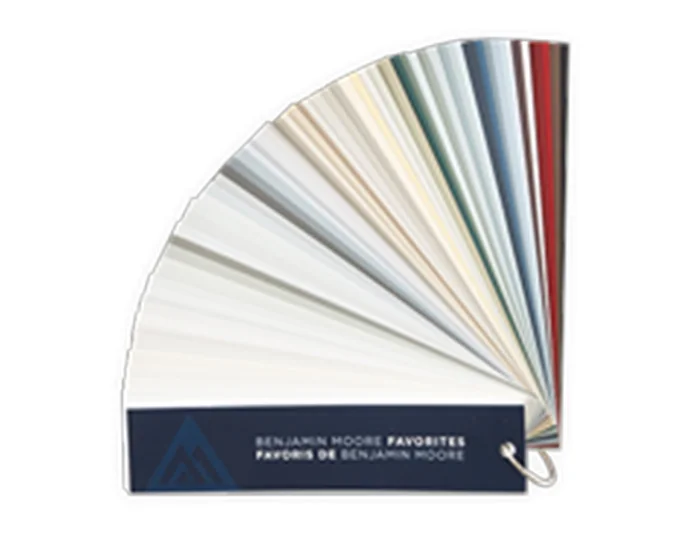
Benjamin Moore & Sherwin Williams Paint Libraries
Benjamin Moore's 75 most popular colors and Sherwin Williams' top 50 - ready to drop into your renders.
 Free
Free
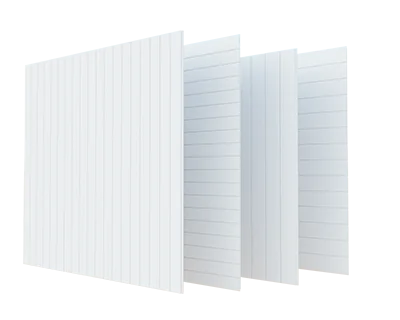
Shiplap Pack
Four ready-to-go shiplap panels in 5.5" and 7.25" widths, both horizontal and vertical.
Meet Your Instructor

John Kaplar
Founder of FOCUSED SketchUp
Student Reviews
Hear What My Students are Saying
Video Testimonials
Facebook Reviews
No Risk Offer
Satisfaction Guarantee
I am so certain you will love this program that I am offering a Risk-Free 14-Day Money Back Guarantee! After 14 days, if you are not satisfied with the course and decide it's not for you, I will give you a full refund.
All you have to do is contact me within 14 days of purchasing, and I will give you 100% of your money back.

FAQ
Questions, Answered
What topics will be covered in this course?
What will I be able to do after completing this course?
Is this course suitable for beginners or is it more advanced?
Are there any prerequisites for this course?
Do you offer a course syllabus or curriculum outline?
Are there any hands-on projects or exercises?
So, To Summarize...
Here is Everything You Get
- 87 video lessons (~16 hours)Included
- FOCUSED Core SketchUp TrainingIncluded
- FOCUSED Core AI Rendering TrainingIncluded
- FOCUSED Core LayOut TrainingIncluded
- 200+ page printable course guide with lesson notesIncluded
- Printable SketchUp cheat sheetIncluded
- Interior Door and Trim Pack with 332 objectsIncluded
- Window and Trim Pack with 263 objectsIncluded
- Hardware Pack with 264 piecesIncluded
- Recessed Light Pack (4 lights in varying wattages)Included
- Sherwin Williams Paint Library (50 most popular colors)Included
- Benjamin Moore Paint Library (75 most popular colors)Included
- Shiplap PackIncluded
- Free access to custom trained GPT for supportIncluded
- Private Facebook group accessIncluded
- Lifetime access + future updatesIncluded
- 14-day money-back guaranteeIncluded
Ready to Start FOCUSED SketchUp + AI for Interior Design?
The Investment
or pay in full with one payment of $749
14-day money-back guarantee